How To Transfer All Emails From One Gmail Account To Another? Get 4 Ways To Do It
Gmail is a popular email service provider and is a product of Google. It has been serving the users for so long and is counted under the name of several email giants like Yahoo mail, AOL, etc. The GUI (Graphical User Interface) of Gmail is handy and does not require you to be an expert to operate it. As a result, the number of users is huge
and is increasing exponentially.
If you are a Gmail user and want to know “How to transfer all emails from one Gmail account to another”, you are in the right place as here assistance will be provided in the form of some well-written steps. Ahead of which you can easily “Transfer Gmail to another Gmail”.
Before getting straight to the ways of transferring emails from one Gmail account to another, let’s first dive into what actually could be the need for it.
What is The Need for Transferring one Gmail to another Gmail?
When it comes to reasons why an individual will require to migrate emails from one Gmail to another Gmail? There could be several reasons like:
- You do not like the username of a Gmail account and want to replace it with a well-established email account
- You are willing to have all emails of working email address transferred to the personal email account
- You have multiple Gmail accounts and want all the emails transferred to a single email account
So, these were the reasons for “Importing one Gmail to another Gmail”.
Now after having understood the reasons why a user will require to shift the emails between the Gmail accounts. It is time to jump in the way of accomplishing the migration.
So, let’s begin.
How To Transfer Emails from one Gmail to another Gmail?
It is quite simple to import emails from one Gmail account to another Gmail account. The best practice to perform this task lies in changing the settings of the POP protocol also known as the Post Office Protocol. This tweak will transfer the emails from one account to another.
So, let’s initiate the steps to configure the POP settings in the old Gmail account.
Way 1: Change POP Settings
Here the status of the POP protocol will be changed to “enabled” for the Gmail account to which you want to transfer. Later, the setting of the destination Gmail account will be changed to receive the email from the source Gmail account
Change Settings for Source Gmail Account
- Step 1: Log in to the Gmail account (Which you want to shift)
- Step 2: Click on the Gear icon located at the top right corner of the screen
- Step 3: Choose “See All Settings”
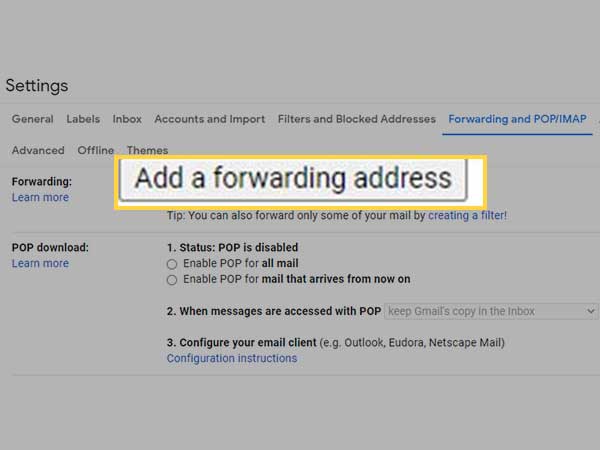
- Step 4: Search and click on “Forwarding and POP/IMAP”, as shown in the image below.
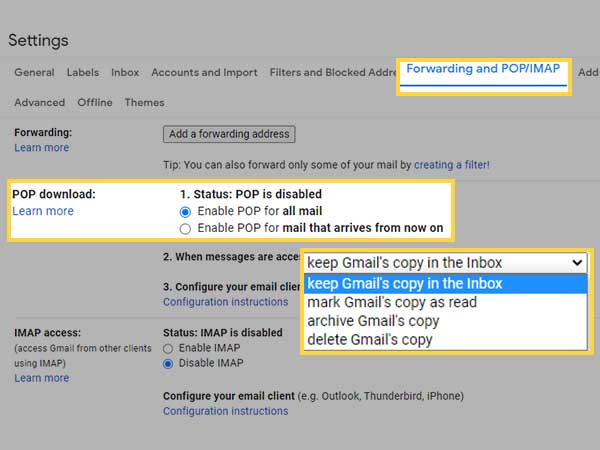
- Step 5: Look for the “POP Download” section and tick the radio button in front of the “Enable POP for all mail”
- Step 6: In the POP download section, look for “When messages are accessed with POP” and under it, several options are available like
- Keep Gmail’s Copy in the Inbox
- Mark Gmail’s copy as read
- Archive Gmail’s Copy
- Delete Gmail’s Copy
You may choose any of them as per your requirement. If you want to choose again after performing the selection, that is possible and you do not have to worry about it at all.
- Step 7: Scroll to the last and click on the “Save Changes” button
Change Settings for Destination Gmail Account
- Step 1: Log in to the Gmail account (at which you want to retrieve the emails) by entering the correct credentials
- Step 2: Locate and click on the Gear icon
- Step 3: A small window will open up, Choose “See All Settings” from this window
- Step 4: Now, a new window will open up as shown below, choose “Accounts and Import”
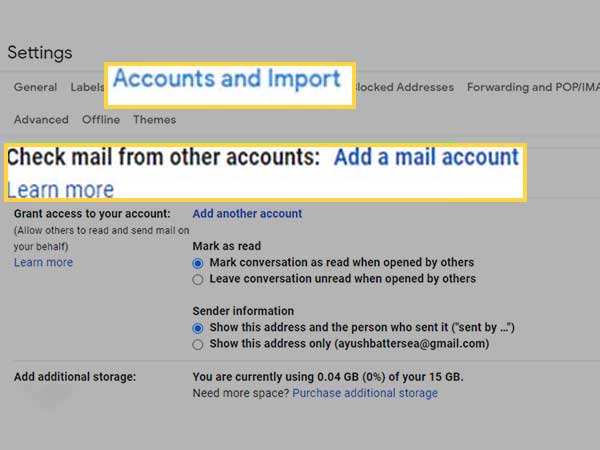
- Step 5: Under the “Check mail from other accounts” section, choose “Add a mail account”
- Step 6: Now, Enter the email address from which you want to fetch the emails
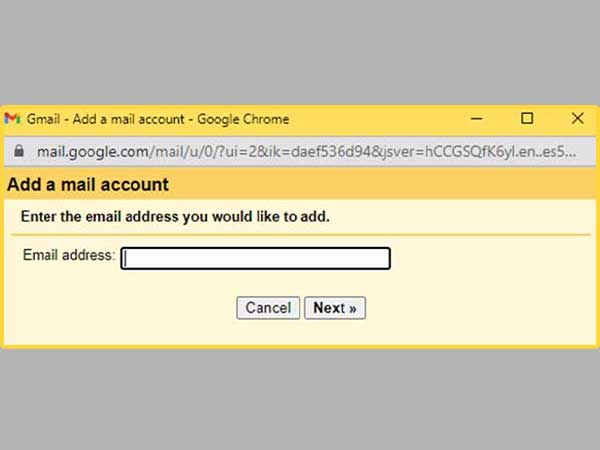
- Step 7: Choose “Next” button
- Step 8: On the new screen, choose “import emails from my other account (POP3)”
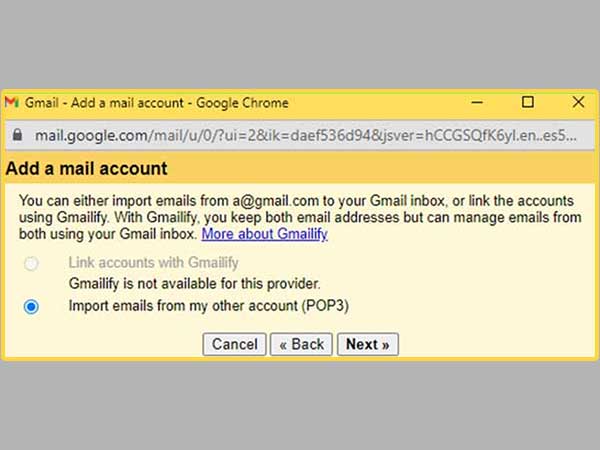
- Step 9: Click on “Next” button
- Step 10: Now a new window asking you to enter the username and password will open up, enter the username and password of the Gmail account from which you want to import
- Step 11: Under POP server, choose pop.gmail.com
- Step 12: Under PORT option select 995
- Step 13: Uncheck the checkbox in front of the “Leave a copy of retrieved messages on the server”
- Step 14: Tick on the check box in front of “Always use a secure connection (SSL) when retrieving mail”
- Step 15: Select “Add Account” button located in the last
- Step 16: On the next screen, under “Would you also like to be able to send mail …” choose “Yes”
- Step 17: Choose “Next” button
- Step 18: Now a new window will open up, in which you will have to provide “Name”, Treat as an alias as checked
- Step 19: Now, click the “Next” button twice and choose “Send Verification”. Once done, close the window by clicking on the “X” button.
- Step 20: Now, log out from the current email account by clicking on the account icon (located on the top right corner). Also, shown in the below image and choose the “Sign Out” button.

- Step 21: After logging out from the Gmail account. Now, log in to the Gmail account from which you want to import the emails.
- Step 22: Go to the “Inbox” and open up the recently received email from “Gmail Team” having the subject “Gmail Confirmation – Send Mail as username@gmail.com”. Copy the confirmation code provided in the email.
- Step 23: Now, login to the previous Gmail account on a different browser and go to its “settings”
- Step 24: Choose “See All Settings”
- Step 25: Click on “Accounts and Import” tab
- Step 26: Under the “Send mail as” section click on the verify link.
- Step 27: Provide a confirmation code in the text box under the “Enter and verify the confirmation code”
- Step 28: Click on the “Verify” button.
This way, you will have both the Gmail accounts connected to each other.
Now, Gmail will start importing the emails in batches of 100 to 200 emails. So, this process will take time and soon enough you will get all the emails transferred under their specific labels and boxes.
Way 2: Set Up Automatic Forwarding
Using this process you can easily forward emails from one Gmail account to another. The methodology accompanied in this procedure is quite easy. There is one thing that should be kept in mind and that is this process can not be carried out via the Gmail app. For this, you should log in to your Gmail account via desktop or laptop. Also, while transferring the emails, the spam folder will not be transferred, only Inbox and upcoming emails will get transferred. So, without wasting time let’s proceed with the steps.
- Step 1: Go to your computer and log in to the Gmail account by entering the correct credentials.
- Step 2: Once logged in, go to the top right corner and click on the gear icon and afterward choose “See All Settings”
- Step 3: Now, choose “Forwarding and POP/IMAP” option
- Step 4: Go to the “Forwarding” section and click on the “Add a forwarding address” as shown in below image.
- Step 5: Now, a pop-up will open up asking you to “Enter a New Forwarding Email Address”
- Step 6: After you have entered the email address, click on the “Next” button
- Step 7: A new window will open up and choose “Proceed” and then click on the “OK” button.
- Step 8: A verification code will be supplied to the above-mentioned email address. Login to that email address and click on the verification link mentioned in the email recently received.
- Step 9: Now, go to the settings of the Gmail account (from which you want to forward the emails) and refresh the web page.
- Step 10: Click the Forwarding and POP/IMAP tab and go to the “Forwarding” section
- Step 11: Verify the mentioned email address by entering the verification code and later, click on the “Verify” button.
- Step 12: Now, choose “Forward a copy of incoming mail to” under the “Forwarding” section
- Step 13: Now choose what to do with the “Gmail copy of your emails”, it is recommended to keep “Gmail’s copy in the Inbox”
- Step 14: Now, scroll down the page and choose the “Save Changes” button (available at the end of the page)
Finally, you have reached the end of the procedure and till now you must have set the forwarding email address. Soon you will start receiving the emails from the added email address.
Way 3: Download the Gmail Emails
Downloading the Gmail email is a great way of extracting all the emails and storing them wherever you want. It is a good way for those who are not interested in changing the settings of Gmail accounts. Steps to download the emails are given below.
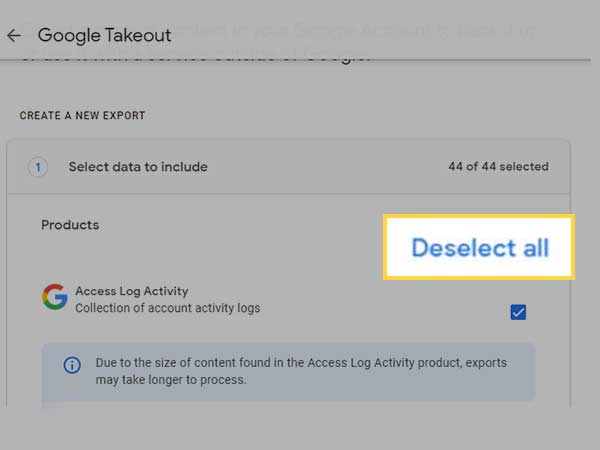
- Step 1: Go to Google Takeout from here
- Step 2: Choose “Deselect All” also shown in the below image
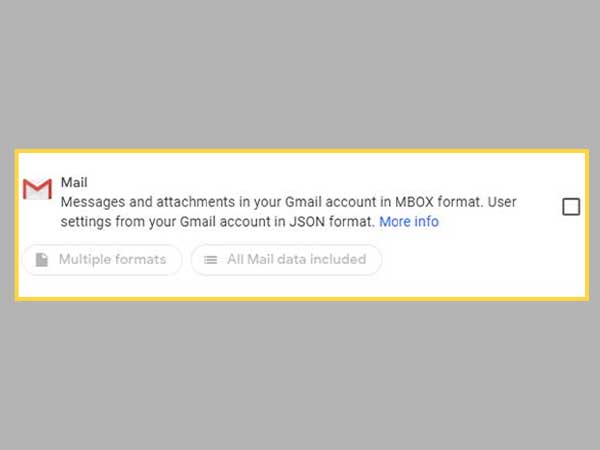
- Step 3: Scroll and find the “Mail” section as shown in the below image and click on the checkbox in front of it
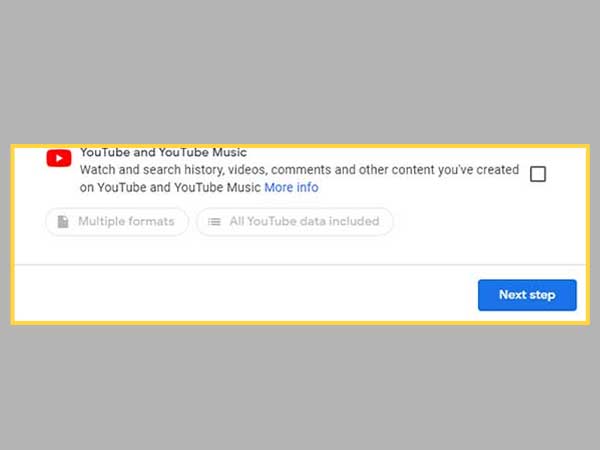
- Step 4: Now, Choose “Next Step” button located at the end of the web page. Get the idea of it from the below-depicted image.
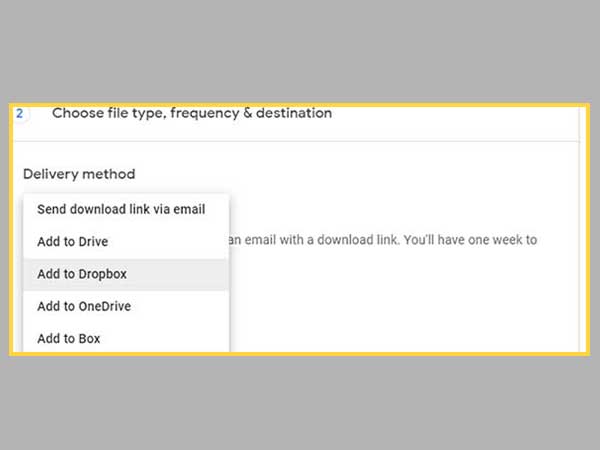
Step 5: Inside the delivery method choose the option of how you want to receive your files. Also shown below.
- Step 6: Choose “Frequency”, “file type, and size” according to your requirement and proceed further by clicking on the “Create Export” button.
This way you can easily export and download the emails. One thing that should be noted here is that you will be allotted a time period of one week within which you can download the files. If you crossed the time period, you will not be able to download the same.
Way 4: Move Emails Manually
In order to transfer the emails from one Gmail account to another Gmail account, you may take the help of an email client like Outlook, Thunderbird, etc. All you have to do is set up both the Gmail accounts on a single email client, and when the emails become visible on the screen, just drag and drop the emails in whichever folder you want. It is the easiest approach to migrate the emails.
In the above-mentioned ways, steps to perform migration of email from one Gmail account to another have been provided. Those who do not want to perform any tweak in the Gmail account settings or those who find it tough, need not worry as “way 3” can be your best choice. This way is easy to perform and does not require anyone to be technically sound. During the process, if Gmail App is crashing or Gmail is not loading properly, you need to fix them on an urgent basis. Apart from this, if still, you are facing difficulty in transferring the emails from one Gmail to another, you may go to its forum and get a fruitful explanation of the same.
Now, similar to this, also read How To Transfer Outlook Emails to Gmail?