What Is WMI Provider Host? How to Fix (WmiPrvSE.exe) High CPU Usage on Windows 10?
- At times, while upgrading Windows 7 to 10, the majority of the Windows users have noticed a spike in their CPU usage which in turn makes the Windows Operating system –lag, hot and slows down.
- Well, the most possible culprit behind the high CPU usage in the Task Manager that you witness is “WmiPrvSE” and that’s what we’re here going to discuss in this blog. So, let’s get started!
What is a WMI Provider Host? Or, What Is Wmiprvse.exe?
To those who know little or nothing about WmiPrvSE.exe, let us tell you that it stands for Windows Management Instrumentation Provider Service. It is a Windows Host Management Process or in short WMI Provider Host—[as per Task Manager] that is used by the Developers for essential ‘Error Reporting’ and ‘Monitoring Purposes’ of Windows 10 operating system.
Why Does WMI Use So Much CPU?
Wmiprvse.exe is one such program that because of its reporting and monitoring tasks is occupying too much of your PC resources and if you check about the same in Task Manager, you witnessed that it consumes the CPU memory around 30%. Although WMI shouldn’t normally be using lots of CPU resources all the time, you can assume that prolonged high CPU usage is an indicator for— ‘something is wrong.’ WMI has the power to directly affect the speed and performance of your computer leaving it nearly unresponsive when another application/software/program or service is suddenly requesting data via WMI.
To be precise, the high CPU usage issue that users have experienced is caused by an unusual behavior of this WMI Provider Host service for not following the patterns it is supposed to!
However annoying it seems, you need not need to worry not about the same. Well, because you can fix this issue by yourself.
So, if you’re ready to get rid of the encountered Wmi Provider Host High CPU usage issue then, let start to try out these below-mentioned solutions such as run some basic command on the command prompt, restart the Windows Management Instrumentation Service, Setting the WMI Service to Demand and 6 more.
Top 9 Troubleshooting Solutions to Fix (WmiPrvSE.exe) High CPU Usage on Windows 10
Before you start, remember that as you never know which one particular solution works in your favor, you have to just work your way down the solutions list until you find the one that helps you in resolving the High CPU usage issue. Basically, by this we mean to say that you may not need to try them all! Now, without any further ado, let’s get started—
Solution 1: Repair Corrupt Files
The very first and basic solution that you can try to fix this issue is by repairing corrupt files of your computer. In order to do so, you need to download and run “Restoro” software. This will help you scan, repair and most importantly restore the corrupt and missing files of your computer. Once you’re done with the scanning, check whether the usage by the process ‘WmiPrvSE’ drops-down or not! However, in case if not, you can move ahead to try the other below-listed solutions.
Solution 2: Run a Virus/ Malware Scan
In certain cases, the culprit behind the High CPU usage comes out to be a virus or malware. So, considering that, you can also try running your antivirus program. To be precise, if through scanning your computer detects any unwanted applications or programs, you should immediately disable/uninstall or remove them from your computer and give a quick restart to it in order to check whether it will help you to get the issue fixed or not!
Solution 3: Restart the Windows Management Instrumentation (WMI) Service
As mentioned this service is so much so important that, if it is stopped or crashed then, none of the applications on a PC runs without it. But why does Wmiprvse.exe crash? Well, if anyhow for instance a ‘poor software or third-party antivirus’ program affects this program then, many of your PC features become useless, and it starts using high CPU usage and above all, you might also not be able to receive error notifications. Imagine how scary it would be!
Therefore, having that in mind, you can try to resolve the issue by restarting the Windows Management Instrumentation service via following these steps—
- Step 1: “Hold the Windows Logo key on your keyboard and at the same time press R—the other key.”
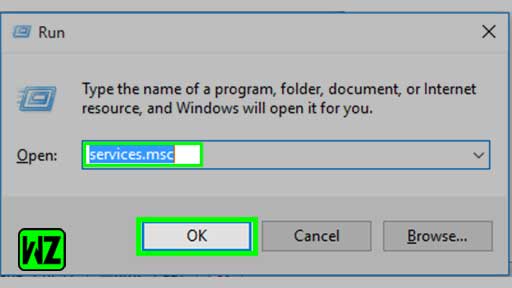
- Step 2: In doing so, the Windows Run Dialog box will pop-up on the screen.

- Step 3: Inside the same, type in ‘Services.msc’ and click on the ‘OK’ button.
- Step 4: This action will open the services console in front of you.
- Step 5: From the services console, what you’ve to do is simply locate the ‘Windows Management Instrumentation Service.’ To do so, you can click on any of the listed services and then, press the ‘W’ key.
- Step 6: In doing so, all the services that start with ‘W’ letter will appear in front of you and then, you can easily scan to select the one you’re looking for!

- Step 7: Now, as you’ve located the service, you can simply choose the ‘Restart’ option for it. This way, the Windows Management Instrumentation Service will be restarted.

In addition to it, if you’re thinking ‘how do I stop Wmiprvse.exe from starting?’ Then, let’s tell you that albeit you also have the option to stop the Windows Management Instrumentation Service from where you just selected the ‘Restart’ option but, it is not at all recommended. It’s because WmiPrvSE.exe is a safe process which is created by Microsoft for Windows to function properly.
So, if you ask anyone this—
| Q: “Do I Need Wmiprvse.exe?” A: The answer to this question is simply ‘Yes’ and you should not shut it down or mess with it. |
Therefore, completely avoid selecting that option, and instead, let it run again to fix the High CPU Usage issue with this process.
Solution 4: Restart Other Associated Services to the WMI
After, restarting the Windows Management Instrumentation Service, if the issue still persists then, make sure to restart other associated services as well and in order to do so perform these steps—
- Step 1: Firstly, you’ve to hover over your mouse in the bottom left corner i.e., onto the ‘Windows Start Button.’ On reaching your cursor there, perform a right-click option.
- Step 2: In doing so, a contextual menu will appear in front of you and from it; you have to simply choose the ‘Command Prompt (Admin).’

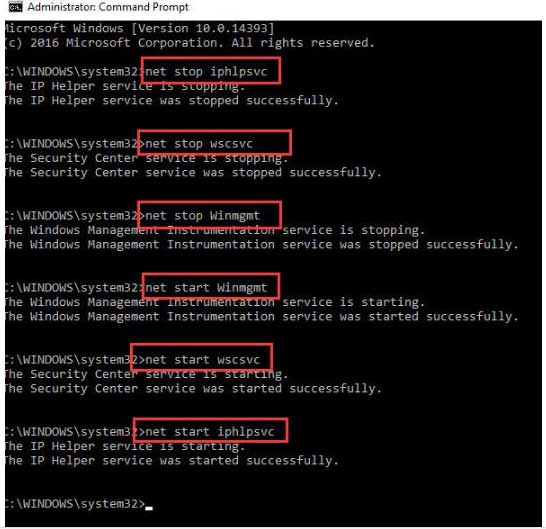
- Step 3: After doing so, a command prompt window will appear on the screen and in the command prompt window that opens up, what you’ve to do is type the following commands one by one—
- net stop iphlpsvc
- net stop wscsvc
- net stop Winmgmt
- net start Winmgmt
- net start wscsvc
- net start iphlpsvc
[Note: You have to remember that, after entering each command, you need to press the Enter key.]
- Step 4: In the end, when you’re done, just reboot your computer and check about the issue.
Hopefully, the issue will be resolved with this solution because this should allow the CPU usage process to drop significantly and in turn, the CPU will be back to its normal use. However, if the issue is still not resolved then, do not get disappointed; rather proceed to the next solution.
Solution 5: Perform SFC and DISM Scan
Sometimes, it is also possible that problems with wmiprvse.exe can occur in case if your ‘Windows 10 installation’ is corrupted. So, considering that a probable reason, try to fix it by performing SFC and DISM scan and to do so, follow these steps—
- Step 1: Firstly, search ‘Command Prompt’ in the Windows search menu and once it appears, click right on it to simply run Command Prompt as ‘Administrator.’
- Step 2: In doing so, Command Prompt window will open and inside the same, enter ‘sfc/scannow’ and hit the ‘Enter’ button.
- Step 3: After that, just wait for the process to finish and then, run the second command by entering “DISM /Online /Cleanup-Image/RestoreHealth” and hit the ‘Enter’ button to run it.
Now, when the “sfc/scannow and DISM /Online /Cleanup-Image/RestoreHealth” process finishes, check if they helped you to fix the High CPU usage issue that occurred due to a problem in wmiprvse.exe. However, in case if not, try out the next given solution.
Solution 6: Perform a Clean Boot into Safe Mode on Your Windows O.S. to Identify a Faulty Application
Next, it is worth enough to note that certain applications that are by-default available or installed on your computer might act as a culprit for causing the high CPU usage by WMI Provider Host.
Bearing that in mind, you need to try out this solution according to which performing a ‘Clean Boot’ and disabling the application that is causing the excessive usage will help you in resolving the issue easily.
To be precise, in doing clean boot, only those services that are essential in the Boot process will remain loaded (enabled) and rest of the services/applications will simply be disabled. So, now, without any further ado, let’s see how to perform a Clean Boot:
- Step 1: In order to perform a clean boot, first ‘Log In’ to your computer with an ‘Administrator’ account.
- Step 2: Once you’re logged in and reach onto the desktop of your computer, press ‘Windows + R’ key shortcut together to open ‘Run Prompt.’
- Step 3: Inside the run dialog box that prompted on the screen, type in ‘msconfig’ and click on the ‘OK’ button for running MSCONFIG.

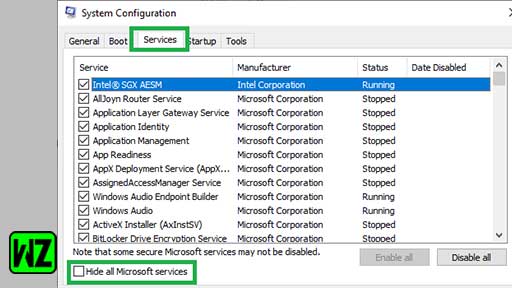
- Step 4: In doing so, a ‘System Configuration’ window will appear in front of you and from the same, click on the ‘Services’ tab.
- Step 5: On the services tab, uncheck the ‘Hide all Microsoft Services’ box which is there at the left-bottom of the System Configuration window.
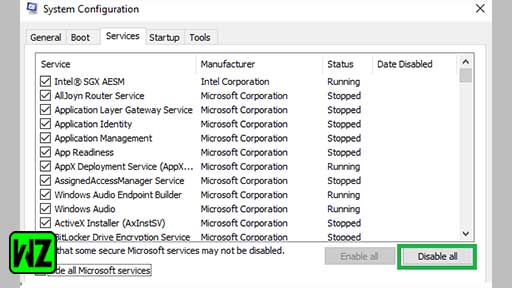
- Step 6: In continuation, what next you’ve to do is click on the ‘Disable All’ button from the bottom-right corner of the same System Configuration window.
- Step 7: After doing so, next you’ve to reach onto the ‘Startup’ tab by clicking on the same option.
- Step 8: From the startup tab, simply click on the ‘Open Task Manager’ option which is mentioned in the middle of the System Configuration window.

- Step 9: In doing so, you’ll reach onto the Task Manager window. On reaching there, you’ve to click on the ‘Startup’ tab.
- Step 10: Inside the startup tab, you’ll see a list of applications and out of all; you need to select any such particular application that has ‘Enabled’ written next to it.
- Step 11: After that, choose the ‘Disable’ option for the same selected application that is listed there.
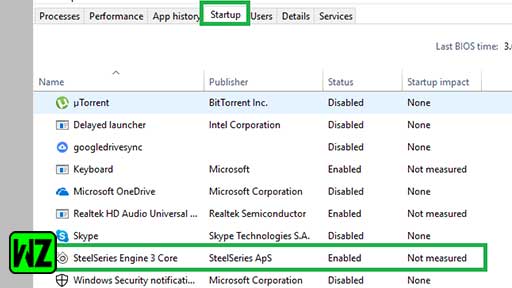
- Step 12: Similarly, you’ve to repeat the discussed process for all those applications in the list that have ‘Enabled’ written next to them.
- Step 13: Once you’re done with this, you can quickly restart your computer to finally see that your computer has been booted in the “Clean Boot” state.
Now, check whether the issue goes away or not! While checking if you see that the high CPU usage is no longer encountered then, it indicated that a third party service or application was the real culprit behind the occurrence of this issue.
However, disabling all applications will not work! You need to enable them back one by one at a time until the high CPU usage issue again occurs. In this manner, you will be able to find out that one application/service that is causing the high CPU usage issue and once you’re able to find it, you can either “Reinstall it” or “Keep it disabled.”
Solution 7: Run System Maintenance Troubleshooter
Moreover, to get rid of the issue, what else you can try is run system maintenance troubleshooter via these given steps—
- Step 1: First of all, press the ‘Win + X’ hotkeys together. In doing so, a list of options will appear on the screen.
- Step 2: From the available options, click on the ‘Control Panel.’

- Step 3: Then, you have to search for the ‘Troubleshoot’ and once you’re able to locate it then, click on the ‘Troubleshooting’ option.

- Step 3: After that, simply click on the ‘View’ which is present there in the left pane of the window.
- Step 4: Now, run the ‘Troubleshooter for System Maintenance.’
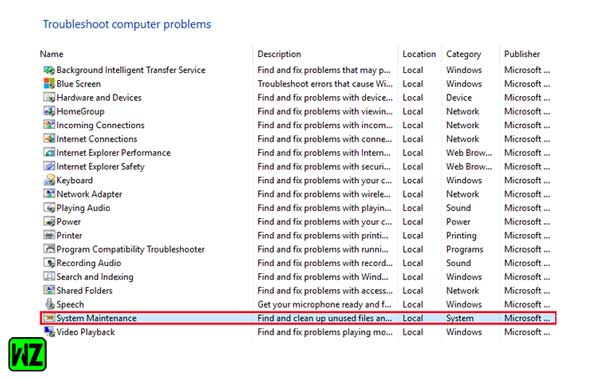
Most probably, doing so will help you to get rid of wmiprvse.exe high CPU Windows 10 issue.
Solution 8: Locate the Components and Drivers Process Using Event Viewer and Uninstall It
Another cause of the particular issue that we’re discussing today is faulty components and hardware drivers. So, finding out the components and drivers process that is causing the issue and uninstalling the same from your PC may help you to fix it!
- Step 1: In order to do so, first you’ve to open the Event Viewer and for that, you can search it in the ‘Start Menu’ and then open it (if you’re using Windows 7 or earlier) or you can press ‘Win + X’ keys together to open the WinX Menu for selecting the ‘Event Viewer’ from it (if you’re using Windows 8/8.1 or 10).
- Step 2: Once the Event Viewer opens, you need to then click on the ‘View’ option in the toolbar which is at the top of the Event Viewer window.

- Step 3: Then, you need to enable both the—‘Show Analytic and Debug Logs’ options.
- Step 4: After that in the left pane of the window, navigate yourself from ‘Applications and Services Logs’ to ‘Microsoft Windows’ and then to ‘WMI-Activity.’

- Step 5: Now, double-click on the WMI-Activity to expand its list of content, and from them, click on the ‘Operational’ option in order to open the WMI Provider Host’s operational logs.

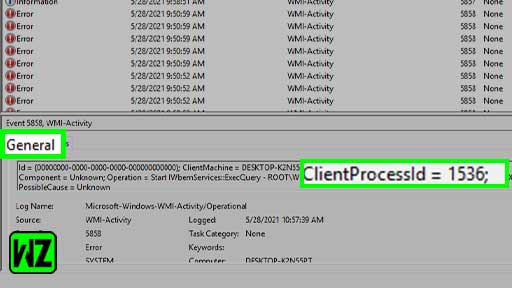
- Step 6: There check for any errors, and in case you find one, click on the same to let it display its specifications at the bottom of the window.
- Step 7: Under the specifications of the error you just clicked on, click on the General tab to look for the ‘ClientProcessId’ option. And, the moment you find it, just note down somewhere the number(s) for instance 1536 that follows it.
- Step 8: Now, just click on the ‘Close’ button to close the Event Viewer window and then, open the ‘Task Manager.’
- Step 9: Inside the Task Manager window, press and hold the ‘Win + R’ hotkey together. In doing so, a Windows Run Dialog box will appear on the screen and in that, type ‘taskmgr’ and hit the ‘OK’ button.

- Step 10: Once you do so, a Task Manager window will open and under it, navigate to the Services tab.
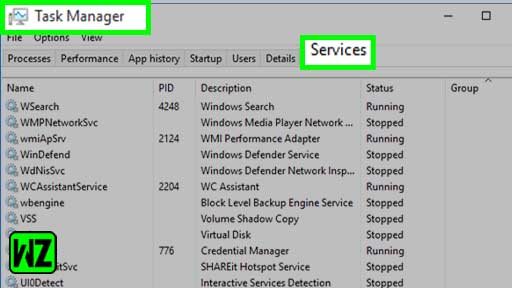
- Step 11: In the services tab look for those services that have the same Process ID i.e., (PID) as the number(s) that follows the ClientProcessID term. This is to be done to find out the service that has the corresponding Process ID as this is what is causing the high CPU usage issue.

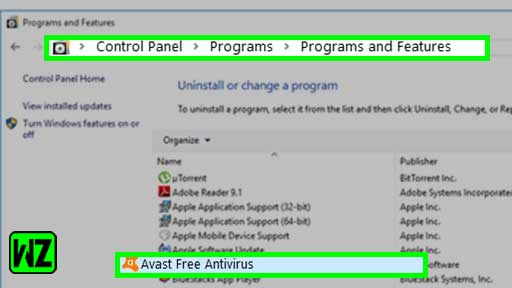
- Step 12: Once you find it, you’ve to disable it as soon as possible. To do so, head towards the ‘Control Panel’ and from it to the ‘Programs & Features’ option in order to uninstall the program that the culprit service was for!
Now, as you have uninstalled the program successfully, most probably the WMI Provider Host should resume again using an exceedingly minimal amount of CPU usage.
Solution 9: Setting the WMI Service to Demand
In spite of trying all the above-discussed solutions, if your WMI service is still constantly on a high CPU usage then, probably it is because some of your program such as “Discord” is using the process. So, considering this scenario in mind, perform these steps to stop this service from using high CPU usage:
- Step 1: Firstly, press the Windows Logo key to open the Windows menu on your computer’s desktop.
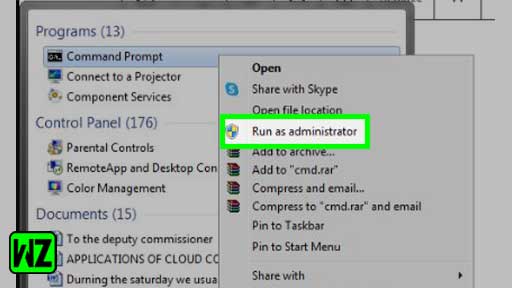
- Step 2: From the menu that opens, search for the Command Prompt option or either type “Command Prompt” in the search menu bar to find it out.
- Step 3: Upon finding it, perform a right-click action on the same and select the “Run as administrator” option for it.
- Step 4: In doing so, the Command Prompt will open. After that, what you’ve to do is type the following command inside the same—
- “sc config Wmi start= demand”
- Step 5: Once the written command is executed, you can quickly restart your computer and check to see if the ‘high CPU usage’ issue still persists or not.
That’s all! With trying any or all these above-discussed top-9 solutions, you most probably can get rid of the encountered “High CPU Usage (by WmiPrvSE.exe) issue on Windows 10.”
Next, read the following related posts: