Avast Antivirus Won’t Open in Windows 10? Here are the Solutions to Try!
Oftentimes, one of the most popular free antiviruses i.e., “Avast”—it won’t open in Windows 10.
The reasons for the occurrence of ‘Avast won’t open’ issue could be many like ‘incompatibility issues between Avast drivers and your PC leading to BSOD errors, interference of firewall settings, broken Avast installation, driver conflicts and not running of Avast service, etc.’
However, no matter what the reason is, this article will show how to fix Avast issues on Windows 10.
So, if you also have encountered the same Avast not opening issue on your Windows 10 PC then, fix it immediately with this guide.
9 Solutions to Troubleshoot Avast Won’t Open Issue on Windows 10
| 1. | Check and ensure that it is running on the most up-to-date version of the Avast Application as well as of your Computer O.S. to let Avast work properly. |
| 2. | If there are incompatibility issues with your PC and it doesn’t recognize Avast then rebuilding the WMI repository is one such solution that worked for many users. |
| 3. | If Avast is not responding properly on your Windows 10, make sure to check the firewall settings. |
| 4. | Next, you can opt for the clean boot process that recognizes issues with the Windows 10 background processes and uses only necessary files and folders to run the O.S. |
| 5. | If an error is preventing the Avast software from opening properly on Windows 10, you should restart the Avast Antivirus to see if that helps. |
| 6. | Another solution is to check Avast installation to fix it in case it’s broken and not properly installed or activated. |
| 7. | If Avast after installation also won’t open on Windows 10 and instead cause a ‘black screen issue’ then, try adding exclusions in Avast to see if it helps. |
| 8. | You can try repairing the software because this will fix corrupted files and might be helpful in case Avast is not working on your Windows PC. |
| 9. | If nothing works, go for a clean install as it can fix almost anything including this particular issue of Avast also. |
Albeit, there have been plenty of solutions that Windows users can consider to fix the encountered Avast is not an opening issue. But, get ready to try your stars with these 9 discussed solutions because most probably these are the solutions that will be most helpful for this problem.
So, without wasting more time, let’s get started—
Instructions (Step-by-Step)
Solution 1: Check and Update Both Avast and Your Computer O.S.
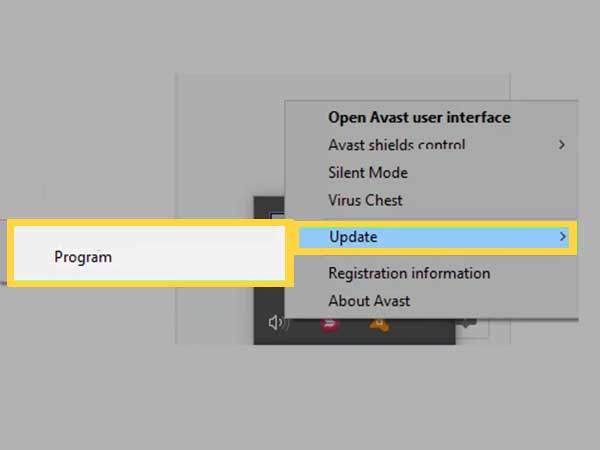
- To begin, perform a right-click action on ‘Avast App icon’ and select ‘Update’ followed by ‘Program’ option from the contextual menu that appears.
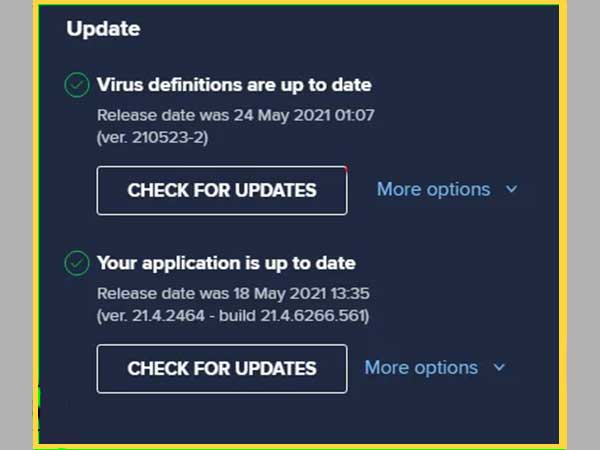
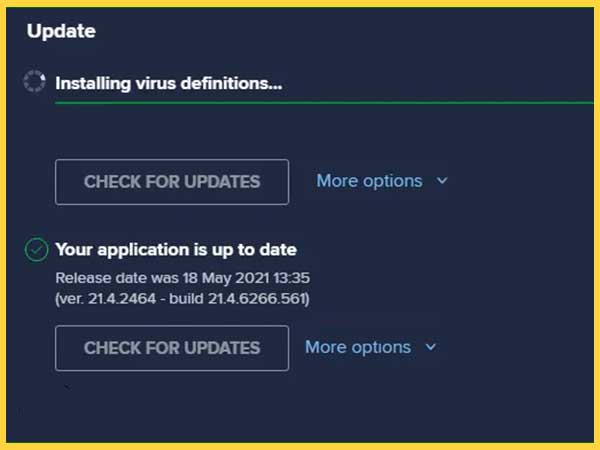
- Next, select the ‘Check for Updates’ option. In doing so, if you get ‘Your application is up to date’ then, you can leave the process here. However, if your application is not updated and there’s an update available then, wait till the program installs the required update.
- Once the update is installed, you’ll be informed with a status message saying your application is up-to-date.
- Now, as you’ve just finished updating a program, it is suggested that you should ‘Restart’ your computer for its better functioning.
In the same manner, update your Windows 10 O.S. to its latest version via following these steps—
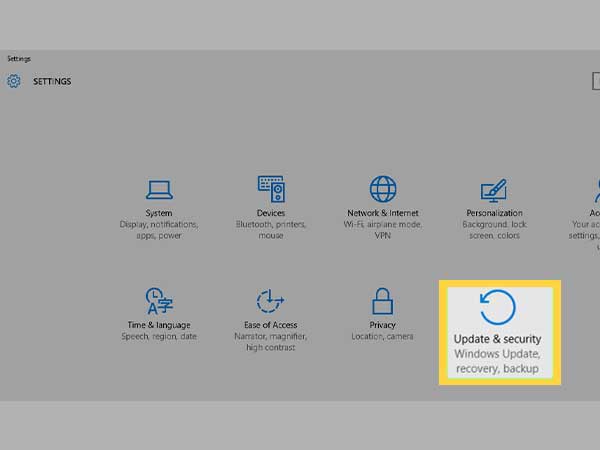
- Press ‘Win + I’ keyboard shortcut and open ‘Windows Settings.’
- From the settings window that opens, select the ‘Update & Security’ option.
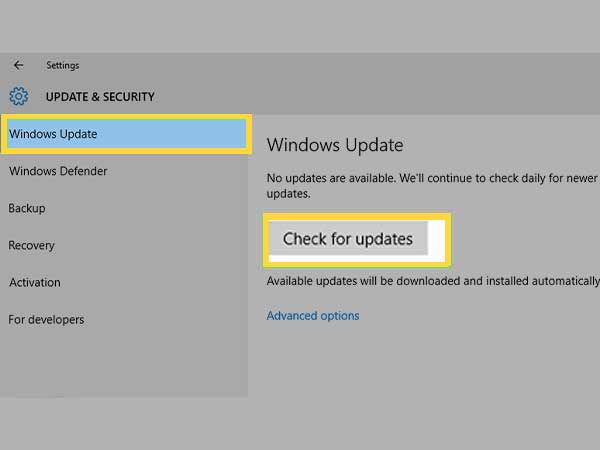
- Inside update & security, you’ve to click on the ‘Windows Update’ option from the left panel.
- Following that, click the ‘Check for updates’ button and then, if an update is available, Windows will automatically download the same update onto your operating system and prompt you to follow the on-screen instruction for its installation.
Now, as the update of your Windows 10 O.S. when the Avast antivirus program is complete, you can check whether the encountered issue has been resolved or not.
However, even after updating, if Avast antivirus is still not able to work properly on your Windows 10 PC then, try the next listed solution.
Solution 2: Enable Avast Shields Control & Rebuilt WMI Repository
- First of all, enable Avast shield control to let Windows recognize Avast. For that, right-click on the ‘Avast icon’ in your taskbar.
- Then, select ‘Avast shields control’ from the context menu that pops up.
- Inside it, choose the ‘Disable for 10 minutes’ option.
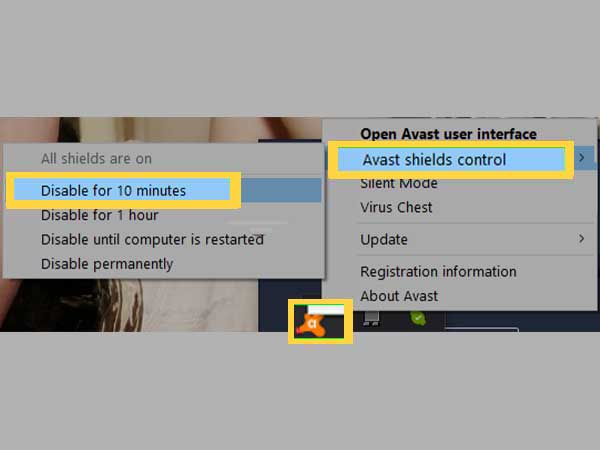
- After that, enable it again by selecting ‘Enable all shields.’
- Now, if the issue is still present, put the cursor in the ‘Windows search bar’ and type ‘cmd.’
- Then, choose the ‘Command Prompt App’ and click on ‘Run as Administrator’ option to launch the ‘Command Prompt’ (Admin) window in front of you.

- Inside the same, paste the below-mentioned command and hit the ‘Enter’ button—
“winmgmt /verifyrepository”
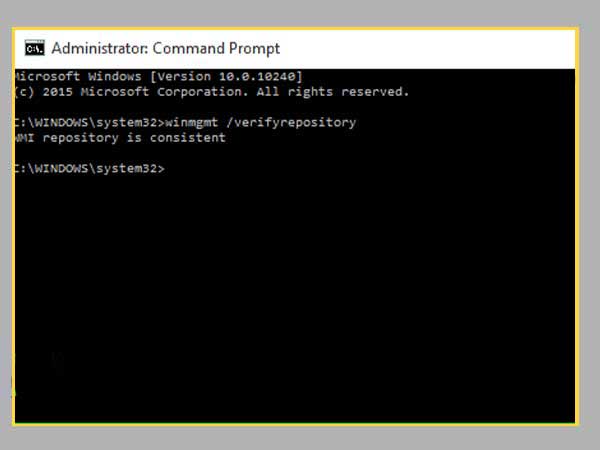
- By doing so, if the WMI repository report seems to be consistent then, type the following below-given command this time and again hit the ‘Enter’ button—
“winmgmt /resetrepository”
- On the contrary, if the WMI repository report seems inconsistent then, you need to enter the below-mentioned command in the window instead of the above one—
“winmgmt /salvagerepository”
This way, you’ll be able to successfully rebuild the WMI repository (that stores meta-information for WMI classes). Now, hopefully you no longer receive a pop-up message saying—
| “Windows Defender and Avast Antivirus both are turned off. Or, Windows did not find an antivirus program.” |
Solution 3: Disable Your Firewall/ VPN on Temporary Basis
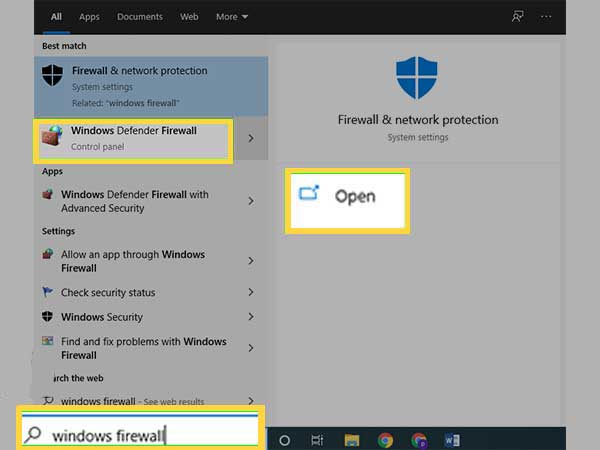
- To temporarily disable your Firewall/VPN, begin by pressing the ‘Windows Start’ button.
- Then, type in “firewall” in the text box that reads—‘Type here to search.’
- Following that, choose ‘Windows Defender Firewall’ from the search result and click ‘Open’ to simply launch the same.
- Next, click on the ‘Turn Windows Defender Firewall on or off’ link from the left panel to further open the customized settings for each type of network wizard.
- Inside it, select the ‘Turn off Windows Defender Firewall (not recommended)’ radio button for both ‘Public & Private Network Settings’ and then, just click on the ‘OK’ button.
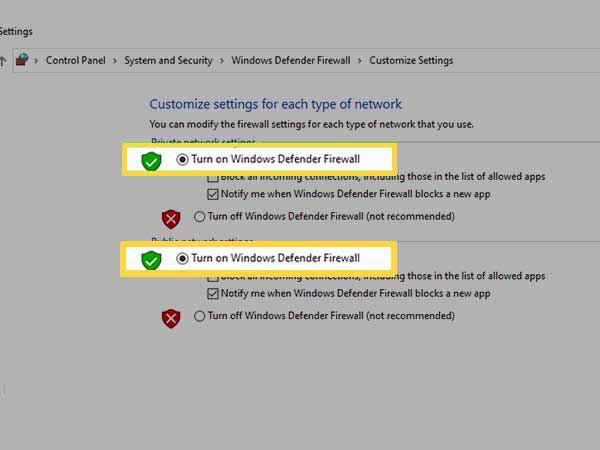
Now, after turning the firewall off, try opening Avast to check if the issue related to the same, has now been resolved or not!
Solution 4: Clean Boot Your Windows 10 Computer System
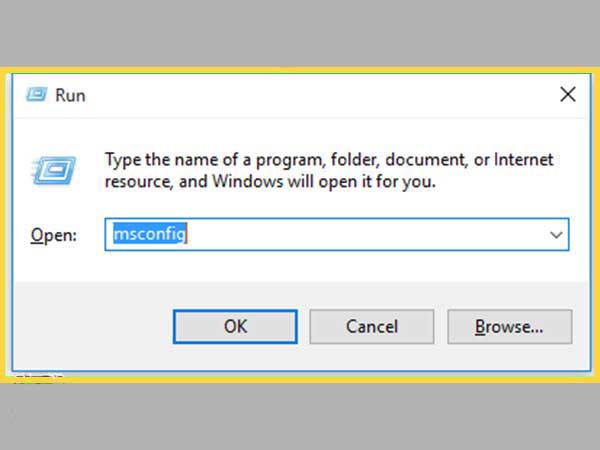
- Open the ‘Windows Run Dialog Box’ using ‘Win +R’ keyboard shortcut.
- Inside the box, type in “msconfig” and click on the ‘OK’ button. In doing so, ‘System Configuration’ window will open in front of you.
- On the system configuration window, you’ve to first select the ‘Services tab’ and then, need to click on the checkbox that reads—‘Hide all Microsoft devices.’
- In continuation, choose the ‘Disable All’ option before clicking the ‘OK’ button.

- Then, just open the ‘Startup tab’ and inside it, click on the ‘Open Task Manager’ link.
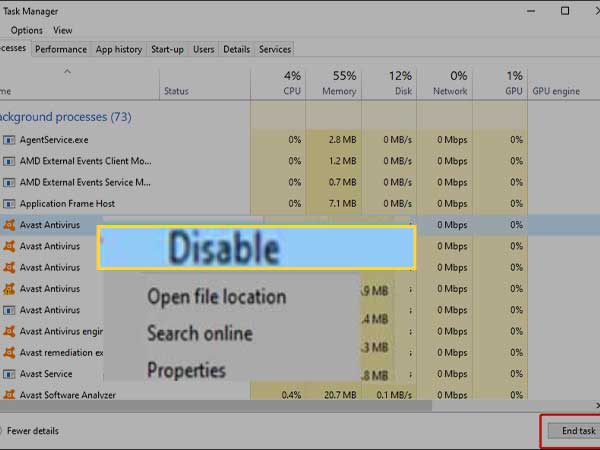
- On the Task Manager window, what you’ve to do is check if any processes are running or not. If not then, move on with the process by clicking the ‘Close’ button.

- Now, you’ve to right-click on all the ‘Tasks’ and click the ‘Disable’ button from the context menu that appears.
- Once you finish doing so, click on the ‘OK’ button in the ‘System Configuration’ window and simply ‘Restart’ your computer to check if the issue still prevails or not!
Solution 5: Restart the Avast Antivirus Service
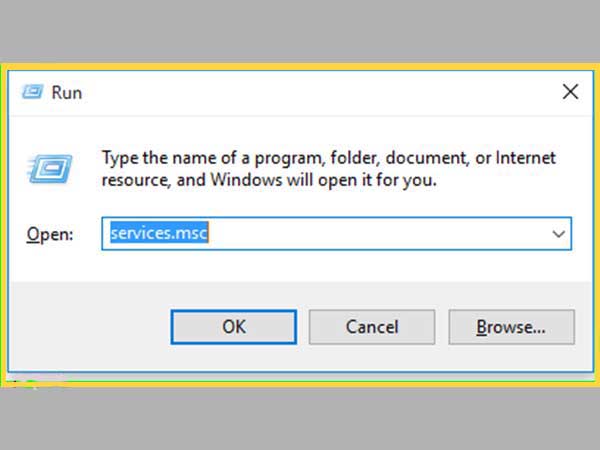
- Open ‘Windows Run Utility’ using ‘Windows + R’ keyboard shortcut.
- Then, type “services.msc” in the available text-field on the Windows Run Utility box and thereafter click on the ‘OK’ button for ‘Services tool’ to open.
- There, you’ve to first change the ‘View by’ option to ‘Large icons.’ This you’ll find at the top-right corner of the window.
- Upon doing so, you need to scroll down the options to locate and click on the ‘Administrative Tools.’
- Next, look at the bottom of the window and click on the ‘Services shortcut.’
- Inside the services list, find out the ‘Avast Antivirus Service’ and right-click on it to select ‘Properties’ from the context menu that pops up on the screen.
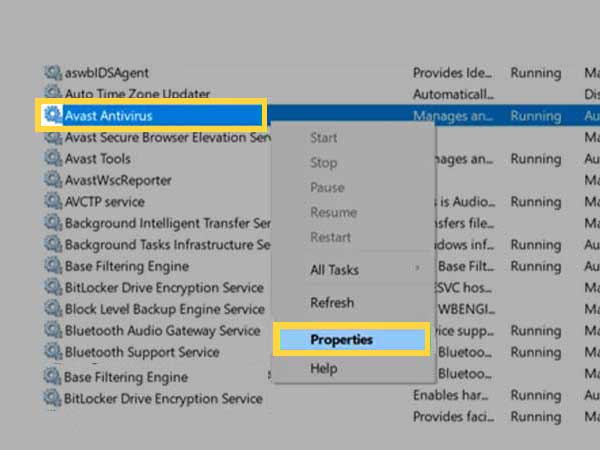
- After doing so, check the service status message to ensure whether the Avast antivirus service is started or not. If yes then, you’ve to just click on the ‘Stop’ button from the middle of the window and leave the process until and unless you begin again.
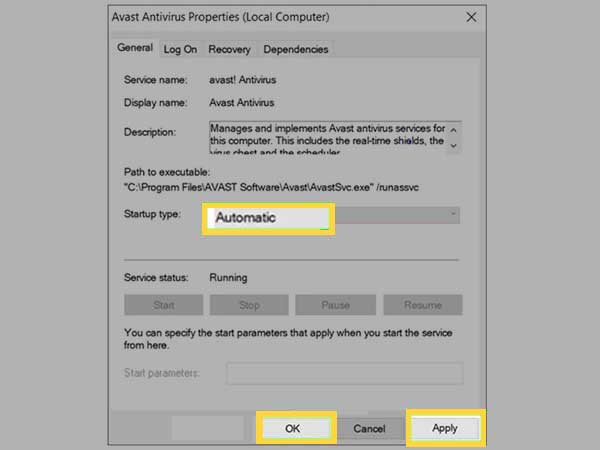
- Now, as you proceed with the process, make sure that the option besides the ‘Startup type’ menu in the Avast antivirus properties window is set to ‘Automatic.’
- While doing so, some dialogue boxes may appear on the screen and you have to ‘Confirm’ them before clicking the ‘OK’ and ‘Apply’ buttons.
- And, lastly, click on the ‘Start’ & ‘OK’ buttons before exiting.
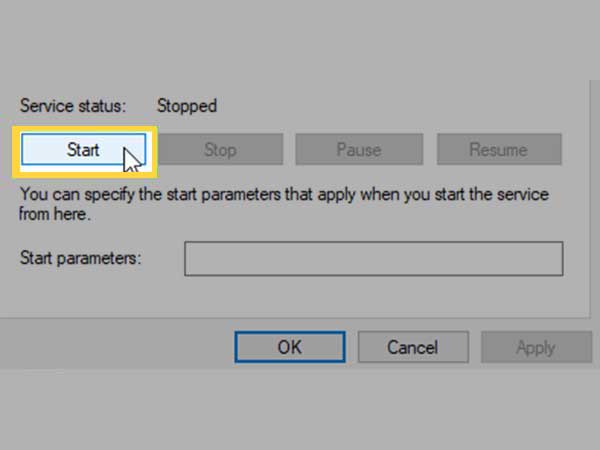
However, when you click on Start, you may likely to receive this particular error message:
| Windows could not start the Avast Antivirus program on the Local Computer.Error 1079: The account specified for this service differs from the account specified for other services running in the same process. |
So, if you actually receive this error then, these are the steps you need to follow further—
- On the Avast antivirus properties window only, switch to the ‘Log On’ tab.
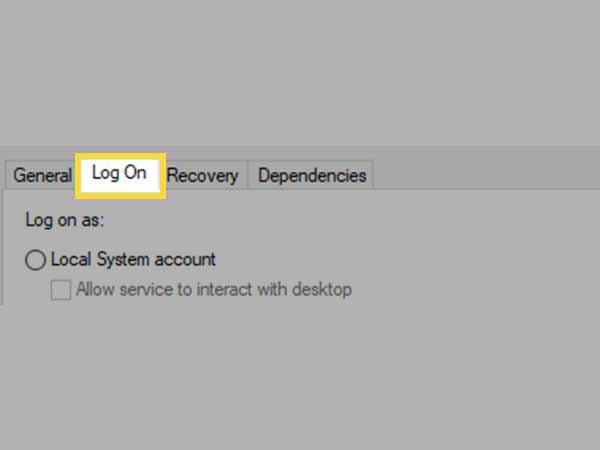
- Then, select ‘This Account’ radio button for ‘Log on as’ option followed by clicking the ‘Browse’ button.
- Next, type your ‘Account’s name’ inside the box that reads—‘Enter the object name to select’ and then, click on the ‘Check Names’ option to wait until the name option is readily available to you.
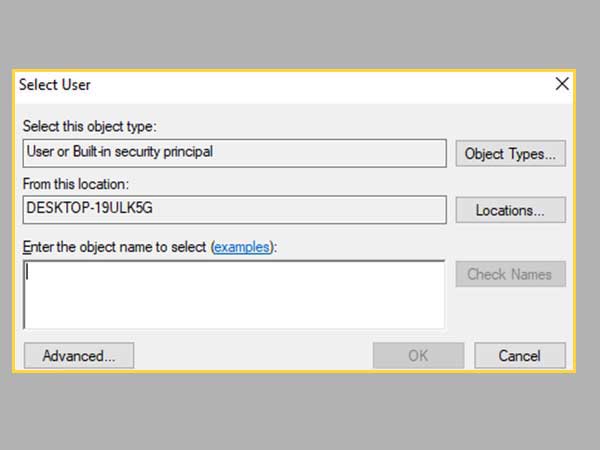
- After that, click on the ‘OK’ button and (if prompted) don’t forget to type in your ‘Password’ in the asked text-box.
Doing so, will help you to not receive the above-mentioned error message again so that you can successfully restart your Avast service and check if the encountered issue is still prevailing or not.
Solution 6: Check Avast Installation
- To check Avast installation, first do right-click on the ‘Windows Start Menu.’
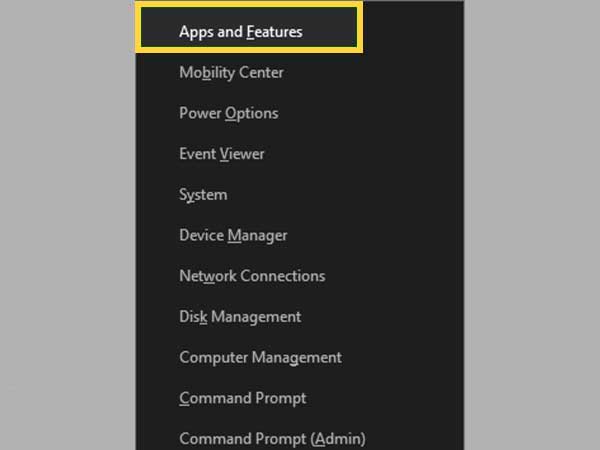
- Then, click on ‘Apps & Features’ option from the list of contextual menu that appear in front of you.
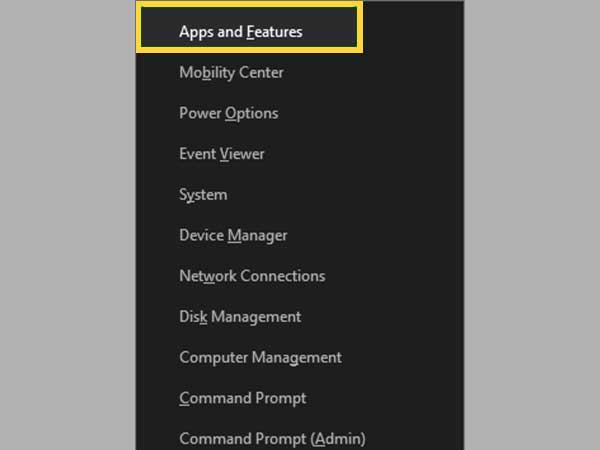
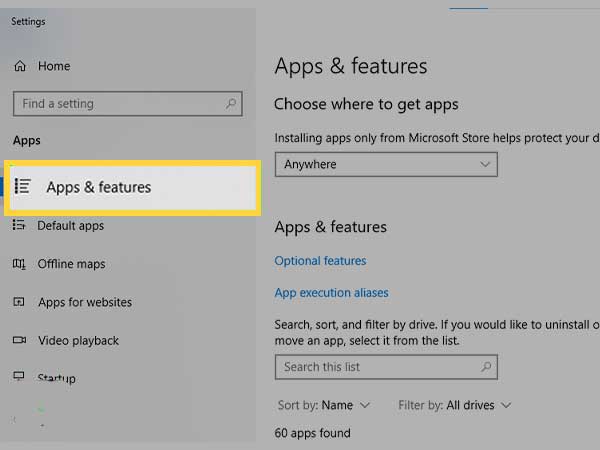
- In apps & features window, if ‘Avast’ doesn’t appear there then, it indicates that the same is not properly installed on your Windows 10 PC and you’ll have to now download and reinstall it. On the contrary, if ‘Avast’ is right there on the ‘Apps & Features’ list then, it means you’ve installed it correctly.
However, despite being properly installed, if Avast causes black screen issue and still not opening on your Windows 10 O.S. then, try this next solution.
Solution 7: Add Exclusions in Avast
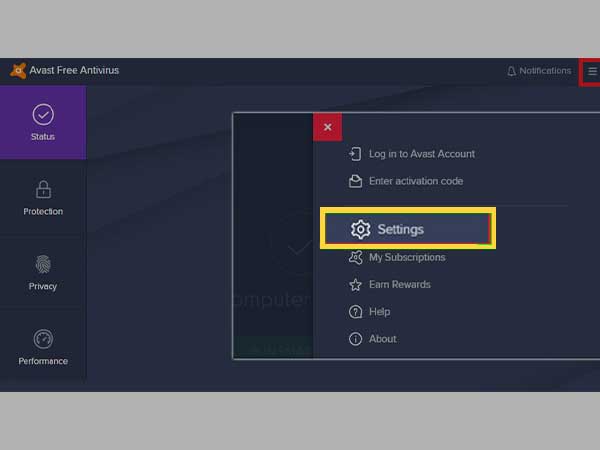
- For adding exclusions, click on the ‘Avast icon’ from the ‘Taskbar.’
- As the software opens, click on its ‘Menu’ which is available in the right panel.
- Then, select the ‘Settings’ option from the list of menu that appears.
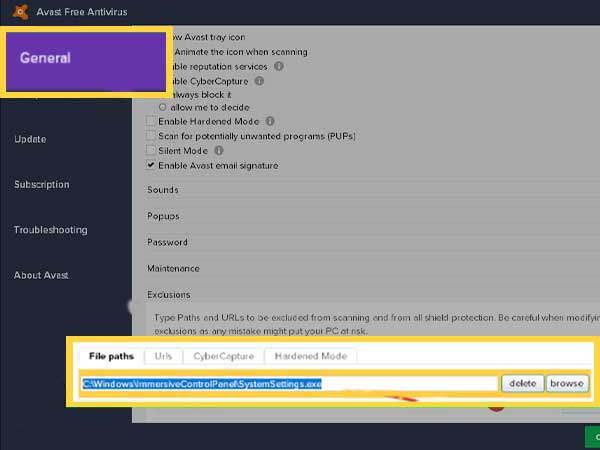
- Next, what you’ve to do is open the ‘General’ tab and inside it, simply choose ‘Exclusions’ followed by clicking the ‘Add Exclusions’ button.
- After that, paste this ‘C:\Windows\Explorer.exe’ path in the text-box under ‘File Path’ option before you click the ‘OK’ button.
- Following this, you need to again click on the ‘Add Exclusions’ down-arrow key to enter the following path—‘C:\Windows\ImmersiveControlPanel\SystemSettings.exe.’
- After entering these exclusions in Avast, click on the ‘OK’ button and reboot your PC to see if this solution helps you to resolve the black screen issue.
Solution 8: Repair Avast Antivirus
- To begin repairing Avast antivirus, log in to your PC with an ‘Administrator Account’ as you won’t be able to repair the program using another account.
- Once you are logged in, ensure no other app or program or antivirus software is running on your PC. If so, close them right away.
- Then, simply do right-click on the Windows Start button and select ‘Apps and Features’ option from the contextual menu that appears.
- Next, you’ve to select the ‘Apps & Features’ from the left panel and following that locate your version of the “Avast Free Antivirus” program.
- After doing so, click on the ‘Uninstall’ option for the same.
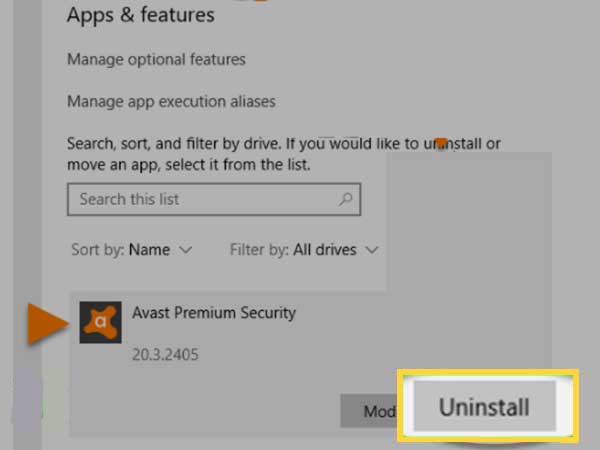
Highlight: Avast Free Antivirus Uninstall
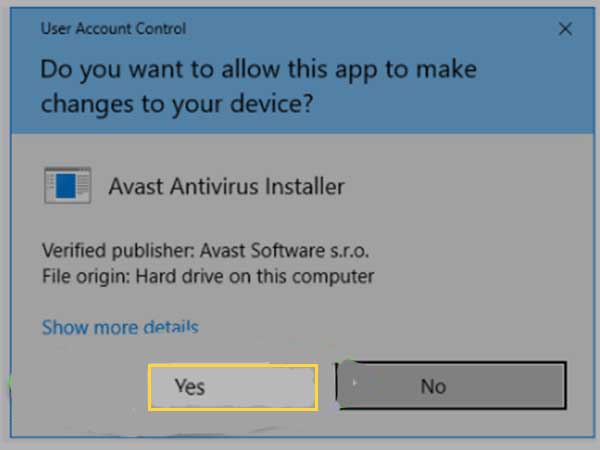
- In doing so, if you’re prompted for permission by the ‘User Account Control’ dialog then, make sure to click ‘Yes.’
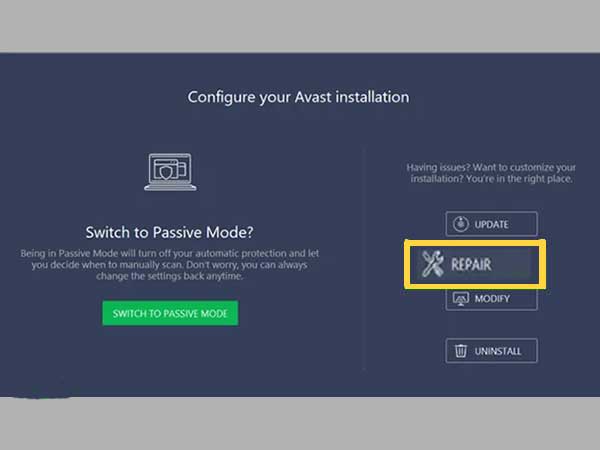
- Now, wait until the ‘Avast Setup’ wizard appears to with the following options—
- Update
- Repair
- Modify
- Uninstall
- As it appears, click on the ‘Repair’ option.
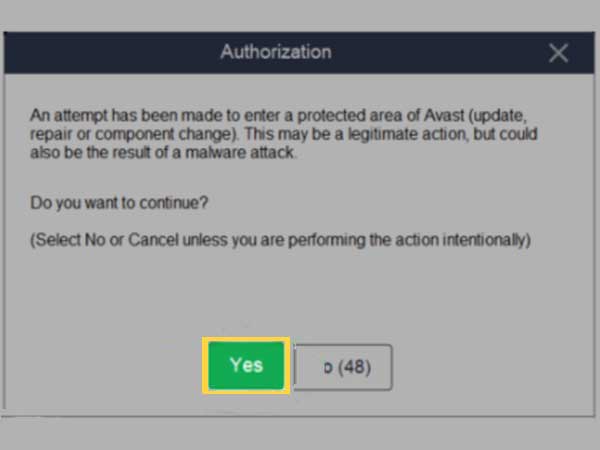
- Next, click on the ‘Yes’ button when a message will pop up on the screen to authorize the installation repair process of the Avast program.
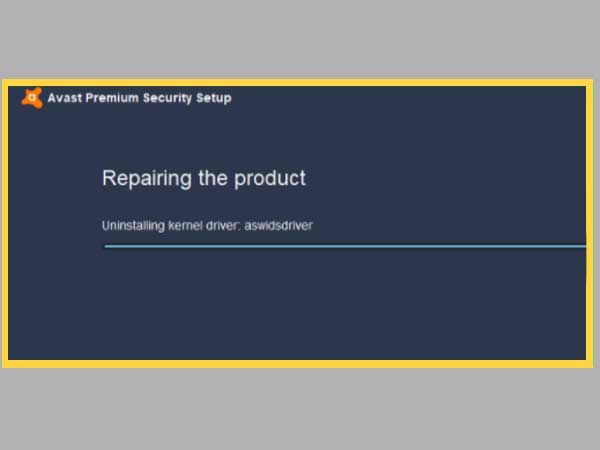
- Upon doing so, wait for a while until and unless the setup repairs Avast Antivirus on your Windows 10 PC.
- In the end, when the repair is complete, all you need to do is click ‘Done’ or if prompted, click on ‘Restart’ computer.
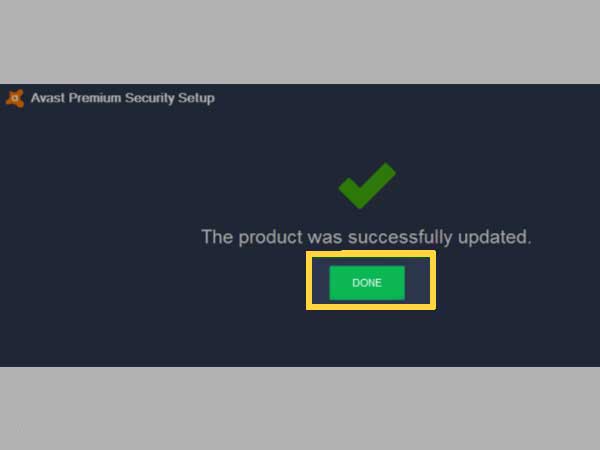
Now, Avast will likely be restarted with the ‘Default Settings’ that used to work when you haven’t encountered the discussed error.
Solution 9: Perform a Clean Install
- To do so, launch your preferred web browser and from the same, navigate onto this Avast.com webpage.
- From here, download the most recent version of the ‘Avast Installation’ by clicking the ‘Download Free Antivirus’ button –available in the middle of the page.

- In addition to that, you also need to download the ‘Avast Uninstall Utility’ and save it on your Windows O.S.
- After you finish downloading files of Avast Installation and Avast Uninstall Utility, disconnect your computer from the internet connection to boot the same into ‘Safe Mode’ via these steps—
|
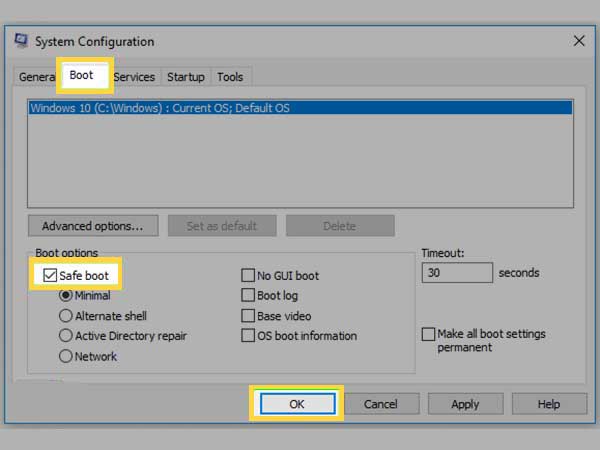
- Following that, what you need to do is run the ‘Avast Uninstall Utility’ and browse for the location where you’ve installed ‘Avast.’ [Note: In order to find the right folder you can navigate through the File Explorer.]
- Once you’re able to locate the installed Avast location, click on the ‘Remove/Uninstall’ option and just ‘Restart’ your computer by booting it into the ‘Normal Startup.’
Now, check whether Avast is able to open normally on your Windows 10 Computer O.S. or not because definitely one of these above discussed solutions will be able to help you fix the Avast not working/ not opening issue.
Bottom Line
That’s all! This is all about how you can easily get rid of the ‘Avast won’t open’ issue (that you’ve recently encountered on your Windows 10 O.S.) for again using this tool without any inconvenience.
Next, you can consider reading the following posts related to Windows 10: